Integrate with AWS CloudWatch Alarms
Connect your AWS CloudWatch alarms to KloudMate Incident Management to route alarm transitions to your escalation policies and notify your team via Slack, email, SMS, or voice. KloudMate groups incoming alarm events, dedupes them to prevent alert noise, and automatically resolves incidents when the alarms return to normal.
This integration uses an AWS Simple Notification Service (SNS) topic to route CloudWatch state changes to a KloudMate webhook endpoint.
Prerequisites
Section titled “Prerequisites”Before you start, make sure you have:
- An Incident Management service configured in KloudMate.
- Permissions in AWS to create SNS topics, subscriptions, and CloudWatch alarms.
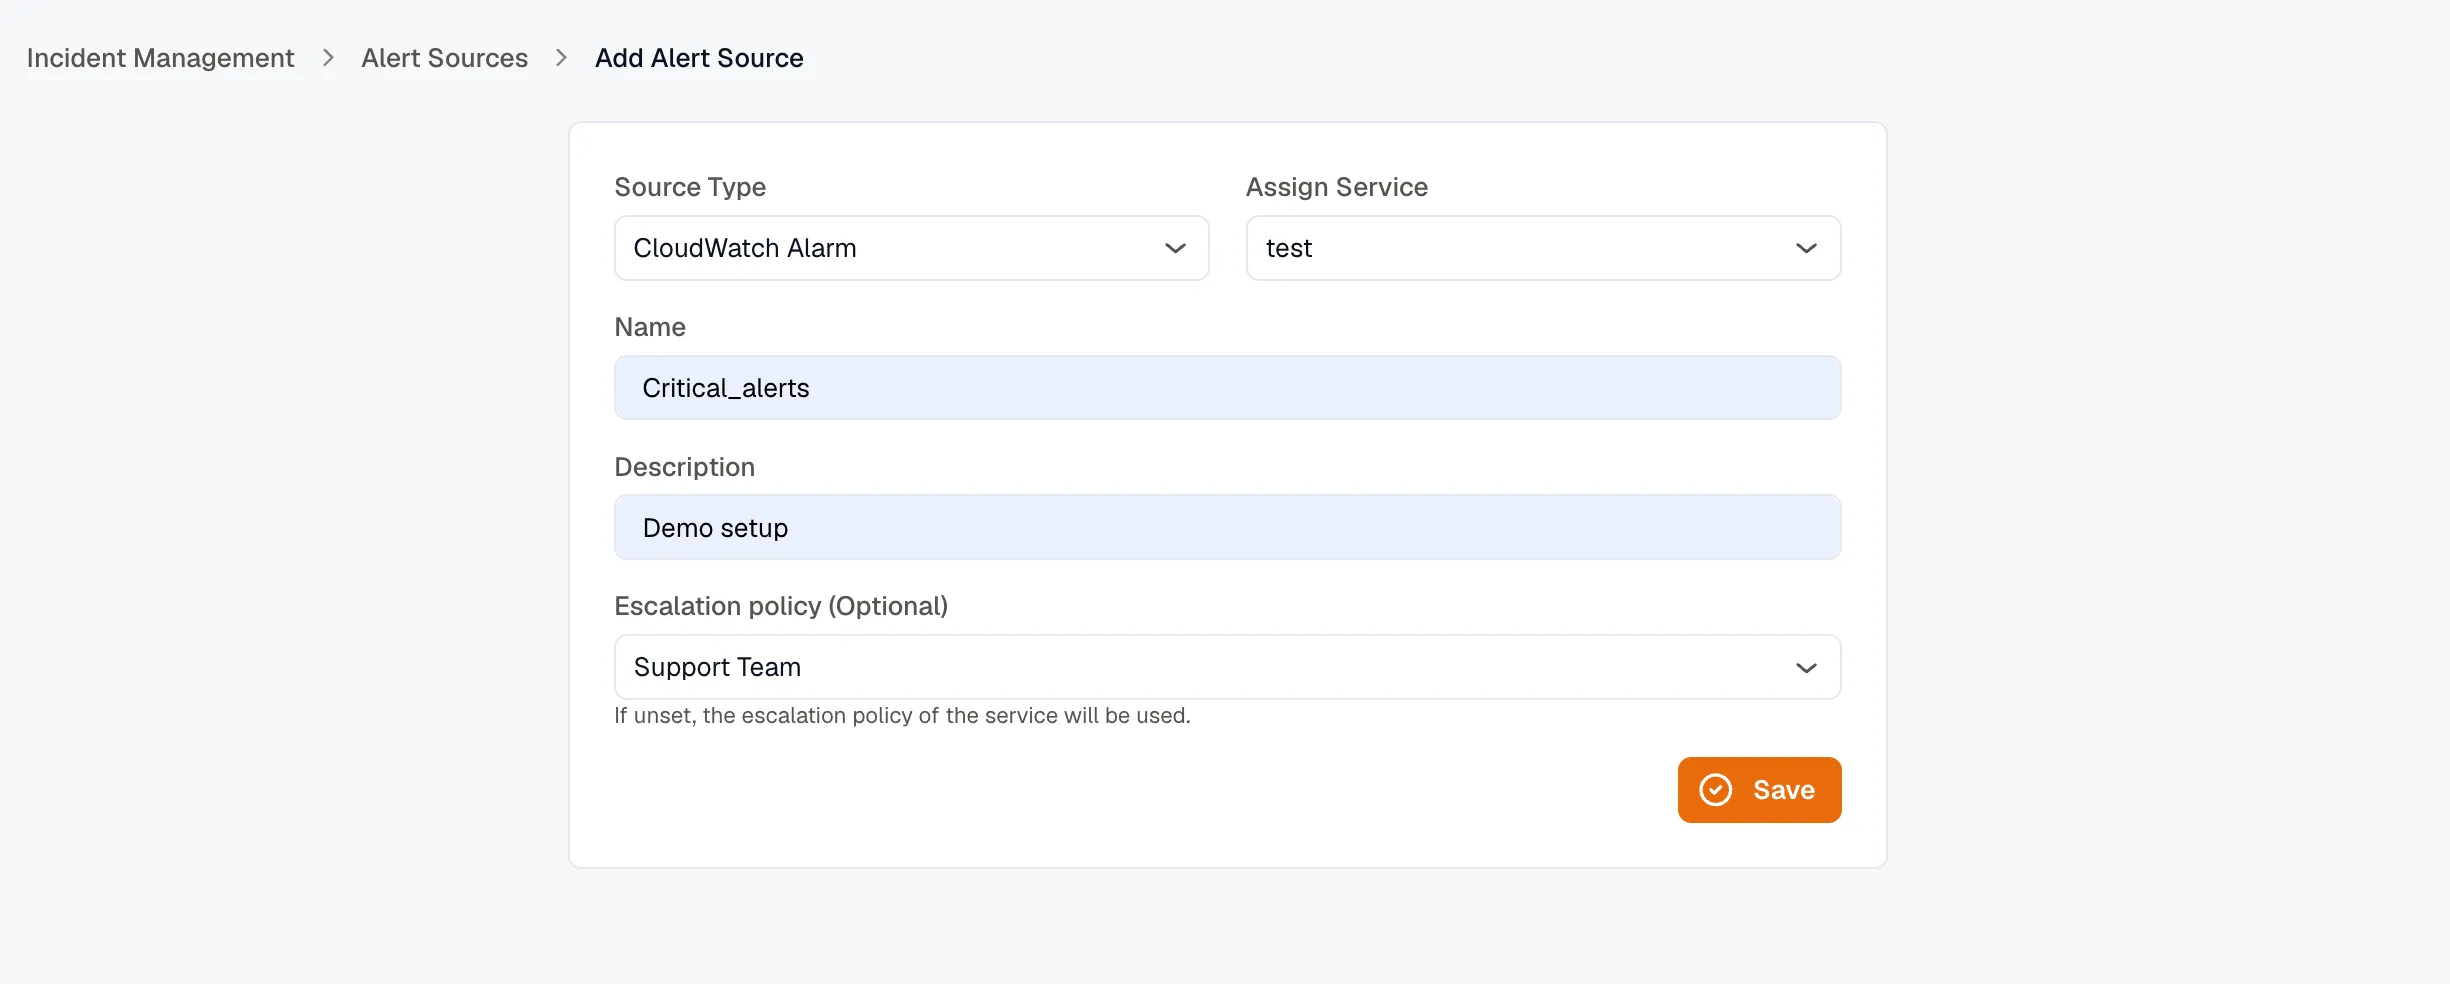
Step 1: Create a CloudWatch alert source in KloudMate
Section titled “Step 1: Create a CloudWatch alert source in KloudMate”Create a unique ingestion endpoint in KloudMate to receive your CloudWatch alerts.
-
Log into the KloudMate Console and open Incident Management → Alert Sources.
-
Click Add (or navigate to a specific Service and click Create Alert Source under details).
-
Set the Type to
CloudWatch Alarm. -
Select the Service you want to associate with these alarms.
-
Enter a Name and Description for the alert source.
-
Click Save.
-
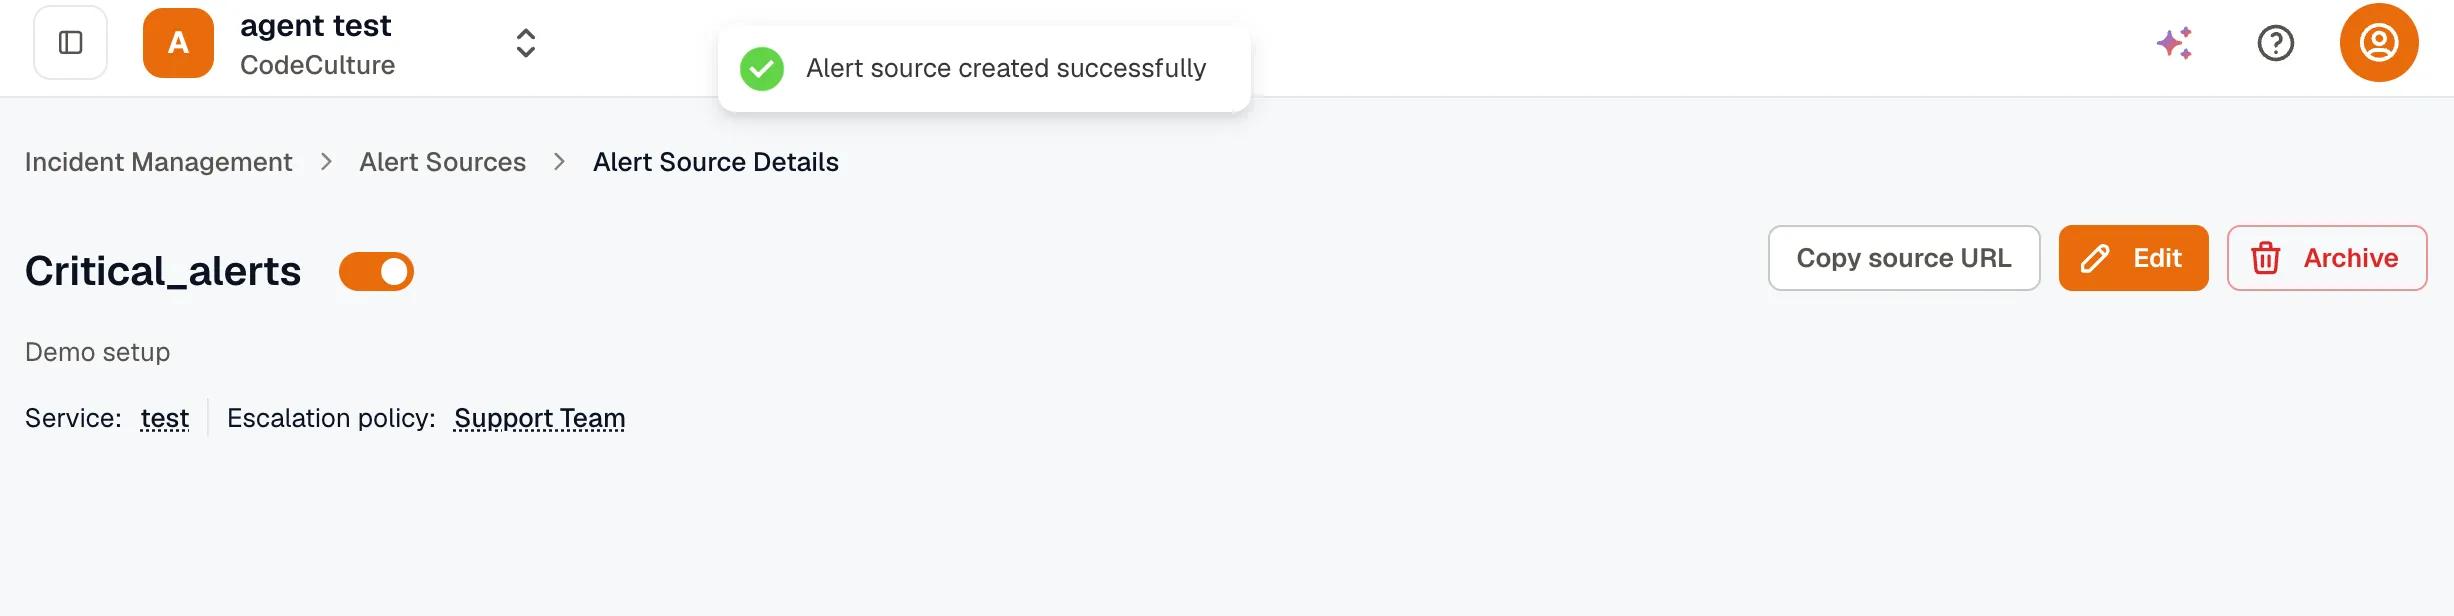
From the details page of your new alert source, copy the Source URL (e.g.
https://api.kloudmate.com/im/hooks/cw-a1b2c3d4e5f6).
Step 2: Set up an AWS SNS topic
Section titled “Step 2: Set up an AWS SNS topic”CloudWatch alarms publish their status changes to an Amazon Simple Notification Service (SNS) topic, which then pushes them to KloudMate.
-
Log into the AWS Management Console and open the Amazon SNS console.
-
In the left navigation, click Topics, then click Create topic.
-
Choose Standard as the topic type.
-
Enter a Name (for example,
kloudmate-incidents-trigger) and optional Display name. -
Keep all other default settings and click Create topic.
Step 3: Create an HTTPS subscription
Section titled “Step 3: Create an HTTPS subscription”Subscribe your KloudMate source URL to your AWS SNS topic.
-
In your newly created SNS topic page, click Create subscription.
-
Set the Protocol to
HTTPS. -
In the Endpoint field, paste the Source URL you copied from KloudMate in Step 1.
-
Keep the default settings and click Create subscription.
Step 4: Configure your CloudWatch alarms
Section titled “Step 4: Configure your CloudWatch alarms”Configure your AWS CloudWatch alarms to notify the SNS topic when they transition to an alarm state and when they recover.
-
Open the Amazon CloudWatch console and navigate to Alarms → All alarms.
-
Select an existing alarm and click Edit, or click Create alarm.
-
In the Configure actions step:
- Under Alarm state trigger, select In alarm.
- Under Send a notification to the following SNS topic, select Select an existing SNS topic and choose the topic you created in Step 2.
-
Click Add notification to configure a recovery action:
- Under Alarm state trigger, select OK.
- Under Send a notification to the following SNS topic, select the same SNS topic.
-
Click Update alarm (or complete the alarm creation steps) to save your changes.
How it works
Section titled “How it works”KloudMate processes incoming CloudWatch alarm payloads automatically to keep your incidents organized and up to date.
Grouping and deduplication
Section titled “Grouping and deduplication”To prevent alert fatigue and duplicate notifications, KloudMate groups incoming alert events:
- When an alarm enters the
ALARMstate, AWS SNS pushes the event payload to KloudMate. - KloudMate generates a unique Group ID by hashing the
AlarmNamefrom the payload. - If no open incident exists for this Group ID, KloudMate opens a new incident, processes your Routing Rules, and triggers the configured escalation policy.
- If an open incident already exists for this Group ID, KloudMate logs the new alarm event under the existing incident and increments its suppression count. No duplicate incidents or notifications are created.
Automatic resolution
Section titled “Automatic resolution”When the underlying issue clears, KloudMate resolves the incident automatically:
- When the CloudWatch alarm transitions back to
OK, AWS SNS pushes the state change to KloudMate. - KloudMate inspects the payload (
NewStateValue == "OK"), identifies it as a recovery signal, and automatically marks the active incident as Resolved. - This immediately halts the escalation policy, stopping any further notifications.
Related
Section titled “Related”- Alert Sources overview — types and details of all supported alert sources.
- Add an Alert Source — how to set up sources and map custom webhook payloads.
- Routing Rules — decide which service, escalation policy, and severity an incident gets.
- Escalation Policies — define who to page and when.